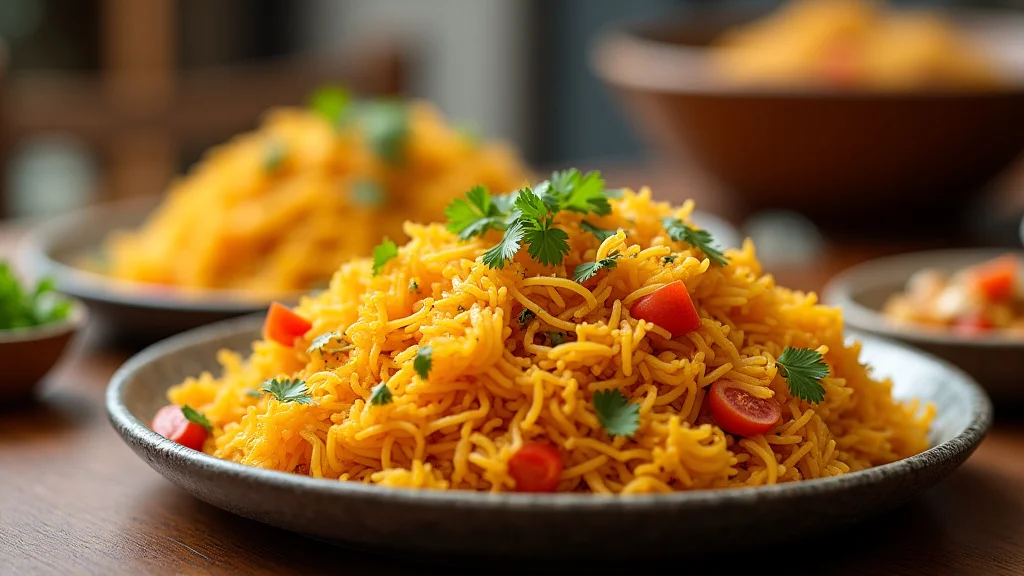
The Best Kacchi Biryani Home Cooking Recipe
Making kacchi biryani home cooking recipe at home can seem a bit tricky for beginners. It involves layers and a special way of cooking. But don’t worry, it’s totally doable!
This guide breaks it down step-by-step. You’ll learn all the simple tricks to get that amazing flavor and texture right in your own kitchen. Get ready to impress yourself and your family with a delicious biryani feast.
Key Takeaways
- You will learn the exact ingredients needed for authentic kacchi biryani.
- Discover the correct marinating time for tender and flavorful meat.
- Understand the special layering technique for perfect biryani.
- Learn how to cook biryani on the stovetop or in the oven.
- Find out how to get that signature smoky flavor.
- Tips for serving your homemade kacchi biryani.
Making Authentic Kacchi Biryani At Home
Kacchi biryani is a special dish where raw meat is cooked with partially cooked rice in layers. This slow cooking process lets the meat and spices infuse deeply into the rice. It’s a labor of love, but the result is incredibly worth it.
Many people find the raw meat aspect intimidating, fearing it won’t cook through. Others worry about getting the rice texture just right – not too mushy and not too hard.
This guide aims to demystify the process. We will cover every single step clearly. You will learn about the best cuts of meat to use and how to marinate them properly.
We will also look at the rice preparation, the art of layering, and the cooking methods. By the end, you will feel confident to recreate this restaurant-quality dish at home.
Choosing The Right Ingredients For Kacchi Biryani
The foundation of any great biryani lies in its ingredients. For kacchi biryani, freshness and quality matter a lot. You’ll need good quality meat, aromatic basmati rice, and a blend of spices.
The type of meat you choose will greatly affect the final taste and texture. Lamb or goat is traditional and offers a rich flavor. Beef can also be used, but it might require a slightly longer cooking time.
Rice selection is also key. Long-grain basmati rice is ideal because it cooks up fluffy and separates well. Look for rice that has been aged for at least a year; this gives it a superior aroma and texture.
The spices are where the magic truly happens. You’ll need whole spices like cardamom, cloves, cinnamon, and bay leaves, as well as ground spices like turmeric, red chili powder, and coriander powder.
Fresh herbs like mint and coriander are essential for freshness and aroma. You will also need onions, ginger, garlic, and yogurt. Yogurt not only tenderizes the meat but also adds a creamy richness to the marinade.
Some recipes also call for saffron, which gives the biryani a beautiful color and a distinct fragrance.
Meat Selection And Preparation
For the most authentic taste and tender results, lamb or goat meat is highly recommended. Cuts like the leg or shoulder work best. These cuts have a good amount of fat and connective tissue, which break down during the slow cooking process, making the meat incredibly succulent.
When buying meat, ensure it is fresh and has a good color. Ask your butcher to cut it into medium-sized pieces, about 1.5 to 2 inches.
Some people prefer to trim excess fat, but a little fat is good as it adds flavor and moisture to the biryani. If you are using beef, opt for cuts like chuck or brisket, which are also good for slow cooking. For chicken, breast or thigh pieces can be used, but they cook much faster, so adjust the marinating and cooking times accordingly to avoid overcooking.
Before marinating, wash the meat thoroughly under cold running water. Pat it dry with paper towels. This is an important step because excess moisture can dilute the marinade and affect the cooking process.
For a really clean flavor, you can even blanch the meat briefly in hot water for a minute or two, then drain and rinse, but this is optional.
Rice Varieties And Their Importance
The type of rice you use for biryani is very important. The goal is to have long, separate grains that absorb all the flavors without becoming mushy. Basmati rice is the gold standard for biryani.
Its long grains and aromatic quality are unmatched. When choosing basmati, look for premium brands that offer aged rice. Aged basmati rice has a lower moisture content, which means it will cook up fluffier and hold its shape better.
Before cooking, it’s crucial to wash the rice thoroughly. Rinse it under cold running water at least 3-4 times until the water runs clear. This removes excess starch, which is what makes rice sticky.
After washing, soaking the rice is also a common practice. Soaking for 30 minutes to an hour helps the grains absorb water evenly and cook more uniformly. This prevents breakage and results in longer, more defined grains.
Some recipes might suggest par-cooking the rice before layering. This means boiling it until it’s about 70-80% cooked. This technique helps ensure the rice is perfectly cooked by the time the meat is done.
If you overcook the rice at this stage, it will turn into a mushy mess in the final dish.
Spice Blends For Kacchi Biryani Flavor
The soul of kacchi biryani lies in its spice blend. This blend is what gives the dish its characteristic aroma and taste. You’ll typically use a combination of whole and ground spices.
Whole spices, when added to hot oil or ghee, release their essential oils, infusing the dish with deep flavors. Common whole spices include green cardamom pods, black cardamom pods (for a smokier note), cloves, cinnamon sticks, and bay leaves.
Ground spices add intensity and color. These usually include turmeric powder for its earthy flavor and golden hue, red chili powder for heat, and coriander powder for a citrusy, earthy note. Cumin powder is also often included.
Some recipes also incorporate garam masala, a blend of ground spices, towards the end of cooking or in the marinade for an extra layer of warmth and aroma. Freshly ground spices are always best for the most vibrant flavor.
The ratio of these spices is critical. Too much of one spice can overpower the others. Many families have their own secret spice blends passed down through generations.
Experimenting is key to finding what you like best. You can often buy pre-made biryani masala, but making your own allows for greater control over the flavor profile.
Marinating The Meat For Kacchi Biryani
Marinating is arguably the most crucial step in making kacchi biryani. Since the meat is added raw, it needs ample time to absorb the flavors and tenderize. A good marinade will penetrate deep into the meat, ensuring every bite is bursting with taste.
The typical marinating time ranges from a minimum of 4-6 hours to overnight in the refrigerator.
The marinade usually consists of yogurt, ginger-garlic paste, and a blend of ground spices. Yogurt acts as a tenderizer due to its acidity, breaking down the tough muscle fibers in the meat. Ginger and garlic are aromatic powerhouses that add depth and zest.
The ground spices bind everything together, infusing the meat with their flavors.
Some recipes also include lemon juice or vinegar in the marinade. These acidic ingredients further aid in tenderizing the meat. Green chilies, finely chopped, can be added for extra heat.
Freshly chopped mint and coriander leaves are also often mixed into the marinade, adding a fresh, herbaceous counterpoint to the richness of the meat and spices.
The Role Of Yogurt In The Marinade
Yogurt plays a starring role in the kacchi biryani marinade. It’s not just for flavor; its natural acidity is key to tenderizing the meat. The lactic acid in yogurt helps to break down the proteins in the meat, making it softer and more succulent.
This is especially important for tougher cuts of lamb or goat, ensuring they become melt-in-your-mouth tender during the slow cooking process.
Beyond tenderizing, yogurt adds a creamy richness to the marinade. It helps to bind the spices and aromatics to the meat, ensuring an even distribution of flavor. It also contributes to the overall moisture content of the biryani, preventing the meat from drying out.
When choosing yogurt, full-fat plain yogurt is best. Avoid flavored or sweetened yogurts, as they will alter the taste of your biryani.
The amount of yogurt used can vary depending on the recipe and the cut of meat. Generally, you want enough yogurt to coat the meat generously. Some recipes also call for adding a little bit of the marinade liquid towards the end of cooking, which further enhances the creamy texture and flavor of the biryani.
Ginger-Garlic Paste And Its Aromatic Power
Ginger and garlic are indispensable aromatics in Indian cooking, and they are vital for biryani. A freshly made ginger-garlic paste provides a pungent, zesty foundation that complements the richness of the meat and spices. The combination offers a complex flavor profile, with ginger adding a warm, slightly peppery bite and garlic providing a sharp, savory depth.
Together, they help to mask any gamey odors from the meat and create a more rounded, appealing aroma.
Making your own paste from scratch is highly recommended for the best flavor. You can do this by grinding equal parts fresh ginger and garlic with a little water in a blender or mortar and pestle until smooth. Store-bought pastes are convenient but often contain preservatives that can slightly alter the taste.
Using a generous amount of this paste ensures that the biryani has a robust and authentic flavor. It’s best to add the paste during the marination stage so it can work its magic on the meat.
The pungency of ginger and garlic mellows significantly as it cooks, transforming into a sweet, savory base. This aromatic foundation is what allows the other spices and ingredients to shine without overwhelming the palate. Without this essential paste, biryani would lack a significant dimension of its characteristic deliciousness.
Adding Fresh Herbs And Chilies
Fresh herbs like mint and coriander are critical for bringing brightness and freshness to kacchi biryani. Mint leaves offer a cool, refreshing counterpoint to the rich, spicy flavors of the meat and spices. Coriander leaves, also known as cilantro, add a vibrant, slightly citrusy note that lifts the entire dish.
These herbs are typically added to the marinade and also layered within the biryani.
The heat of the biryani is often controlled by fresh green chilies. You can adjust the number of chilies based on your preference for spice. Finely chop them or slit them lengthwise before adding.
Some people prefer to remove the seeds and membranes from the chilies to reduce the heat while still getting some of the chili flavor. When layering, scattering these fresh ingredients among the rice and meat helps to distribute their flavors evenly throughout the dish.
The aroma released by these fresh herbs and chilies during the cooking process is incredibly inviting. They are not just flavor enhancers but also contribute to the visual appeal of the biryani, adding pops of green amidst the colorful rice and meat.
The Art Of Layering Kacchi Biryani
Layering is what makes kacchi biryani so visually appealing and ensures even cooking. It’s a deliberate process of arranging ingredients in specific orders. The goal is to create distinct layers of meat, rice, and aromatics.
This method allows the steam trapped within the pot to cook the raw meat perfectly while the rice absorbs all the delicious juices released.
Typically, the process starts with a layer of marinated meat at the bottom of a heavy-bottomed pot. This ensures the meat is closest to the heat source, allowing it to cook thoroughly. Over the meat, a layer of partially cooked rice is spread evenly.
This rice layer acts as a cushion, preventing the meat from sticking and burning.
Garnishes like fried onions, mint leaves, coriander leaves, and sometimes saffron-infused milk are sprinkled between layers. The top layer is usually rice, sometimes mixed with saffron for color. Sealing the pot tightly is vital.
This traps the steam, creating a pressure-cooker effect that cooks the biryani evenly. Dough is often used to seal the lid, or a tight-fitting lid with a heavy object on top.
Preparing The Pot For Layering
Choosing the right pot is the first step. A heavy-bottomed, thick-walled pot, like a Dutch oven or a traditional handi, is ideal. This type of pot distributes heat evenly and prevents the biryani from burning at the bottom.
Before you begin layering, ensure the pot is clean and dry. Some traditional recipes suggest greasing the pot with ghee or oil, which can add an extra layer of richness and prevent sticking.
The initial layer usually consists of the marinated meat, spread out evenly. Make sure all the marinated meat, including any leftover marinade, goes into the pot. This ensures you don’t lose any of the precious flavor.
Some chefs like to add a few whole spices like cardamom and cloves directly onto the meat layer for an intensified aroma.
The idea behind the bottom layer being meat is that it needs the most direct heat to cook through. If rice were at the bottom, it might become overcooked and mushy before the meat is ready. This thoughtful arrangement is key to achieving the perfect balance of tender meat and fluffy rice.
Strategic Rice Placement And Par-Cooking
Once the marinated meat is arranged at the bottom of the pot, the next crucial step is the rice layer. The rice should be partially cooked, about 70-80% done. This par-cooked rice will finish cooking in the steam generated from the meat and its marinade.
Spread this rice evenly over the meat layer. Ensure there are no gaps, as this allows steam to escape.
Using a slotted spoon or a ladle, gently spread the rice. Avoid pressing down too hard, as this can compact the rice and make it dense. The aim is to create a fluffy layer that will absorb the flavorful juices from below.
If you are using saffron, this is the time to sprinkle it over the rice. You can infuse saffron threads in a tablespoon of warm milk or water and drizzle it evenly. This gives the biryani its signature golden hue and aromatic fragrance.
Some recipes also involve adding a layer of fried onions (birista) and fresh herbs like mint and coriander on top of the rice. These additions not only enhance the flavor but also contribute to the visual appeal of the finished dish. The careful placement of each element ensures that every spoonful of biryani is a balanced mix of flavors and textures.
Adding Aromatics And Garnishes
The layers are enhanced with aromatic additions and garnishes that contribute to both flavor and visual appeal. Fried onions, known as birista, are a popular addition. These caramelized onions add a deep, sweet, and savory flavor.
You can make them at home by thinly slicing onions and frying them in oil until golden brown and crisp, then draining them on paper towels. Sprinkling a generous amount of these over the rice adds a delightful crunch and complexity.
Fresh herbs, such as chopped mint and coriander leaves, are scattered generously over the rice. These herbs release their fragrant oils as they steam, infusing the biryani with a fresh, herbaceous aroma that cuts through the richness. If you are using saffron, a few strands soaked in warm milk or water are often drizzled over the top layer of rice.
This not only imparts a beautiful golden color but also a subtle, luxurious flavor.
Some recipes might also include a drizzle of ghee (clarified butter) over the top layer. Ghee adds a wonderful richness and gloss to the finished biryani. The combination of these garnishes and aromatics creates a multi-layered flavor experience and makes the biryani a feast for the eyes as well as the palate.
Cooking Methods For Kacchi Biryani
Once layered, kacchi biryani is traditionally cooked using the ‘dum’ method. ‘Dum’ refers to slow cooking on very low heat, allowing the ingredients to cook in their own steam. This method ensures that the raw meat cooks perfectly without becoming dry and that the rice absorbs all the aromatic flavors.
There are a few ways to achieve this, both on the stovetop and in the oven.
The stovetop method involves placing the sealed pot on a low heat, often with a tawa (griddle) placed underneath to further diffuse the heat and prevent scorching. The oven method involves placing the sealed pot in a preheated oven, which provides a more consistent and even heat, ensuring perfect cooking.
Regardless of the method chosen, the key is to maintain a consistent, low temperature for a specified duration. This allows the magic of slow cooking to transform simple ingredients into an extraordinary dish. The sealing of the pot is paramount, as it locks in the steam, creating the perfect cooking environment.
Stovetop Cooking With The ‘Dum’ Technique
The traditional way to cook kacchi biryani is on the stovetop using the ‘dum’ method. After layering and sealing the pot, place it on a low heat. To ensure gentle and even heating, it’s common practice to place a flat griddle (tawa) on the burner first, and then place the biryani pot on top of the tawa.
This setup acts as a heat diffuser, preventing the bottom of the pot from overheating and scorching the biryani.
Cook on very low heat for about 45-60 minutes for lamb or goat, or until the meat is tender and the rice is fully cooked. The exact time will depend on the thickness of the pot, the heat of your stove, and the type of meat used. You can tell the biryani is ready when you hear the steam hissing from the sealed lid and can smell the wonderful aromas.
Resist the urge to open the lid too early, as this releases the precious steam needed for cooking.
Some people like to place a heavy weight on top of the lid to ensure a tight seal. The dough seal, if used, should also be checked to ensure no steam is escaping. Once cooked, let the biryani rest for at least 10-15 minutes before opening the lid.
This allows the flavors to meld further and the rice to settle.
Oven Baking For Even Cooking
Baking kacchi biryani in the oven offers a more consistent and controlled cooking environment. Preheat your oven to a moderate temperature, usually around 180°C (350°F). Place the sealed biryani pot directly into the preheated oven.
The oven’s surrounding heat cooks the biryani evenly from all sides, minimizing the risk of uneven cooking or burning.
Baking time in the oven is typically similar to the stovetop method, around 45-60 minutes for lamb or goat. Ensure the pot is well-sealed to trap all the steam. If your pot lid is not very tight, you can cover the pot with aluminum foil before placing the lid on top, and then perhaps secure it with kitchen twine or place the foil directly over the pot opening before the lid.
This ensures maximum steam retention.
After the baking time, check for tenderness. You can gently insert a skewer into the meat to see if it yields easily. The rice should be fluffy and fully cooked.
Allow the biryani to rest in the oven with the heat turned off for about 10-15 minutes before serving. This resting period is crucial for the flavors to settle and for the grains of rice to separate perfectly.
Sealing The Pot For ‘Dum’ Cooking
A tight seal is absolutely essential for the ‘dum’ cooking method to work effectively. If steam escapes, the meat may not cook properly, and the rice might become dry. There are a few common ways to achieve this seal.
The most traditional method involves making a dough from flour and water. Knead a simple dough, similar to what you would use for chapati, until it’s pliable.
Roll out the dough into a long rope and press it firmly around the rim of the biryani pot, just below the edge where the lid sits. Then, place the lid tightly onto the pot, pressing down firmly to ensure the dough creates an airtight seal between the lid and the pot. This dough seal will cook along with the biryani and can be discarded later, though some adventurous cooks enjoy a bite of the cooked dough.
Alternatively, if you have a very tight-fitting lid, you can simply place a heavy object, like a mortar and pestle or a clean brick, on top of the lid. This extra weight ensures that the lid stays firmly in place, preventing any steam from escaping. For pots with less tight lids, covering the pot opening with a layer of aluminum foil before placing the lid on can also create a good seal.
Serving And Enjoying Your Kacchi Biryani
Once your kacchi biryani has finished cooking and rested, it’s time for the best part: serving! The visual appeal of a well-layered biryani is stunning. Gently fluff the rice from the sides using a fork or a flat spoon to reveal the layers of fragrant rice and tender meat beneath.
Avoid stirring too vigorously, as this can break the rice grains and mix the layers too much.
Serve the biryani hot, ensuring each portion gets a good mix of rice and meat. Traditionally, kacchi biryani is served with raita, a cooling yogurt-based side dish. Raita can be plain or mixed with vegetables like cucumber, onion, and tomato.
A simple salad or a side of pickled onions also pairs wonderfully.
The aroma itself is an invitation to enjoy. Take a moment to appreciate the complex flavors and textures. Each spoonful should offer tender, spiced meat, fluffy, fragrant rice, and the delightful subtle hints from the herbs and spices.
It’s a dish that truly satisfies the soul.
Accompaniments For Kacchi Biryani
While kacchi biryani is a complete meal in itself, certain accompaniments enhance the dining experience. Raita is almost always served alongside. This cooling yogurt dip helps to balance the richness and spice of the biryani.
Cucumber raita, made with grated cucumber, yogurt, and a pinch of cumin, is a popular choice. Onion and tomato raita adds a bit more texture and tanginess.
A simple side salad with fresh greens, thinly sliced onions, and a squeeze of lemon can provide a refreshing contrast. Some people enjoy serving biryani with a side of pickled onions or a tangy mango pickle. The sharp, vinegary notes of pickles cut through the richness of the biryani beautifully.
For those who prefer something slightly different, a simple shorba (broth) can also be a nice addition, offering a warm, savory counterpoint.
The key is to choose accompaniments that complement the biryani without overpowering its delicate flavors. The goal is to create a harmonious balance on your plate, where each component adds to the overall enjoyment.
Presentation Tips For Homemade Biryani
Presentation can elevate your home-cooked biryani from delicious to spectacular. When serving, use a large, shallow serving dish. Gently loosen the layers with a fork, starting from the sides and working towards the center.
This helps to reveal the beautiful colors and textures of the rice and meat. Try to keep the layers somewhat distinct rather than completely mixing them.
Garnish generously! Top the biryani with more freshly fried onions, a sprinkle of fresh coriander and mint leaves, and perhaps a few strands of saffron. A few slivers of green chilies can add visual interest and a hint of heat.
If you’ve used ghee, a light drizzle over the top just before serving adds a beautiful sheen. Serving in traditional earthen pots or decorated bowls can also add to the aesthetic appeal.
Remember, the visual appeal of biryani is part of its charm. The contrasting colors of the golden rice, the rich brown of the meat, and the vibrant green herbs are a feast for the eyes before you even take your first bite. Make it look as good as it tastes!
Common Myths Debunked
Myth 1: Kacchi Biryani Is Too Difficult To Make At Home
Many people believe that kacchi biryani is a dish best left to professional chefs because it seems too complicated. The reality is that while it requires attention to detail and patience, it’s very achievable for home cooks. By following a clear step-by-step recipe and understanding the core techniques like marination and layering, anyone can create delicious kacchi biryani.
Myth 2: Raw Meat In Biryani Won’t Cook Properly
A common fear is that the raw meat used in kacchi biryani won’t cook thoroughly. This is a misconception. The ‘dum’ cooking method, which involves slow cooking in a sealed pot, ensures that the steam generated from the meat and its marinade cooks the raw meat perfectly.
The long, slow cooking time allows the meat to become incredibly tender and fully cooked through.
Myth 3: You Need Special Equipment To Make Biryani
Some might think you need fancy cooking equipment to make authentic biryani. While a heavy-bottomed pot or Dutch oven is recommended for even heat distribution, you can achieve excellent results with standard kitchen cookware. The key is the cooking technique, not necessarily expensive tools.
A tight-fitting lid is more important than the brand of pot.
Myth 4: Biryani Is Always Very Spicy
While biryani often uses a variety of spices, it doesn’t have to be overwhelmingly spicy. The heat level can be adjusted by controlling the amount of chili powder and fresh green chilies used. Furthermore, the spices in biryani contribute to a complex flavor profile, not just heat.
The warmth and aroma from spices like cardamom, cinnamon, and cloves are very different from pure spiciness.
Frequently Asked Questions
Question: How long should I marinate the meat for kacchi biryani?
Answer: For the best flavor and tenderness, marinate the meat for at least 4-6 hours, or preferably overnight in the refrigerator. This allows the spices and yogurt to penetrate the meat deeply.
Question: Can I use chicken instead of lamb or goat?
Answer: Yes, you can use chicken, but it cooks much faster. You’ll need to reduce the marinating time and the cooking time to avoid overcooking the chicken. Using bone-in chicken pieces will yield a more flavorful result.
Question: What does ‘dum’ cooking mean for biryani?
Answer: ‘Dum’ cooking refers to the traditional method of slow-cooking biryani on very low heat in a sealed pot. This traps the steam, allowing the ingredients to cook in their own juices, ensuring the meat is tender and the rice is perfectly infused with flavor.
Question: How do I know when the biryani is cooked?
Answer: You’ll know the biryani is cooked when you hear consistent steam hissing from the sealed lid and can smell the rich aroma. You can also gently test a piece of meat for tenderness and check if the rice grains are fully cooked and separate.
Question: What is the purpose of frying onions for biryani?
Answer: Fried onions, or ‘birista’, add a deep, sweet, and savory flavor to the biryani. They also contribute a delightful crunch and a rich aroma. They are typically layered within the biryani and used as a garnish.
Wrap Up
Making delicious kacchi biryani at home is totally within reach. This guide showed you the simple steps for selecting ingredients, marinating meat, layering flavors, and cooking it perfectly using the ‘dum’ method. Focus on good marination and careful layering.
You can achieve amazing results and enjoy an authentic, flavorful biryani right from your own kitchen.
Related Posts

Easy Homemade Chicken Nuggets Cooking Recipe

Easy Crispy French Fries Cooking Recipe